Introduction
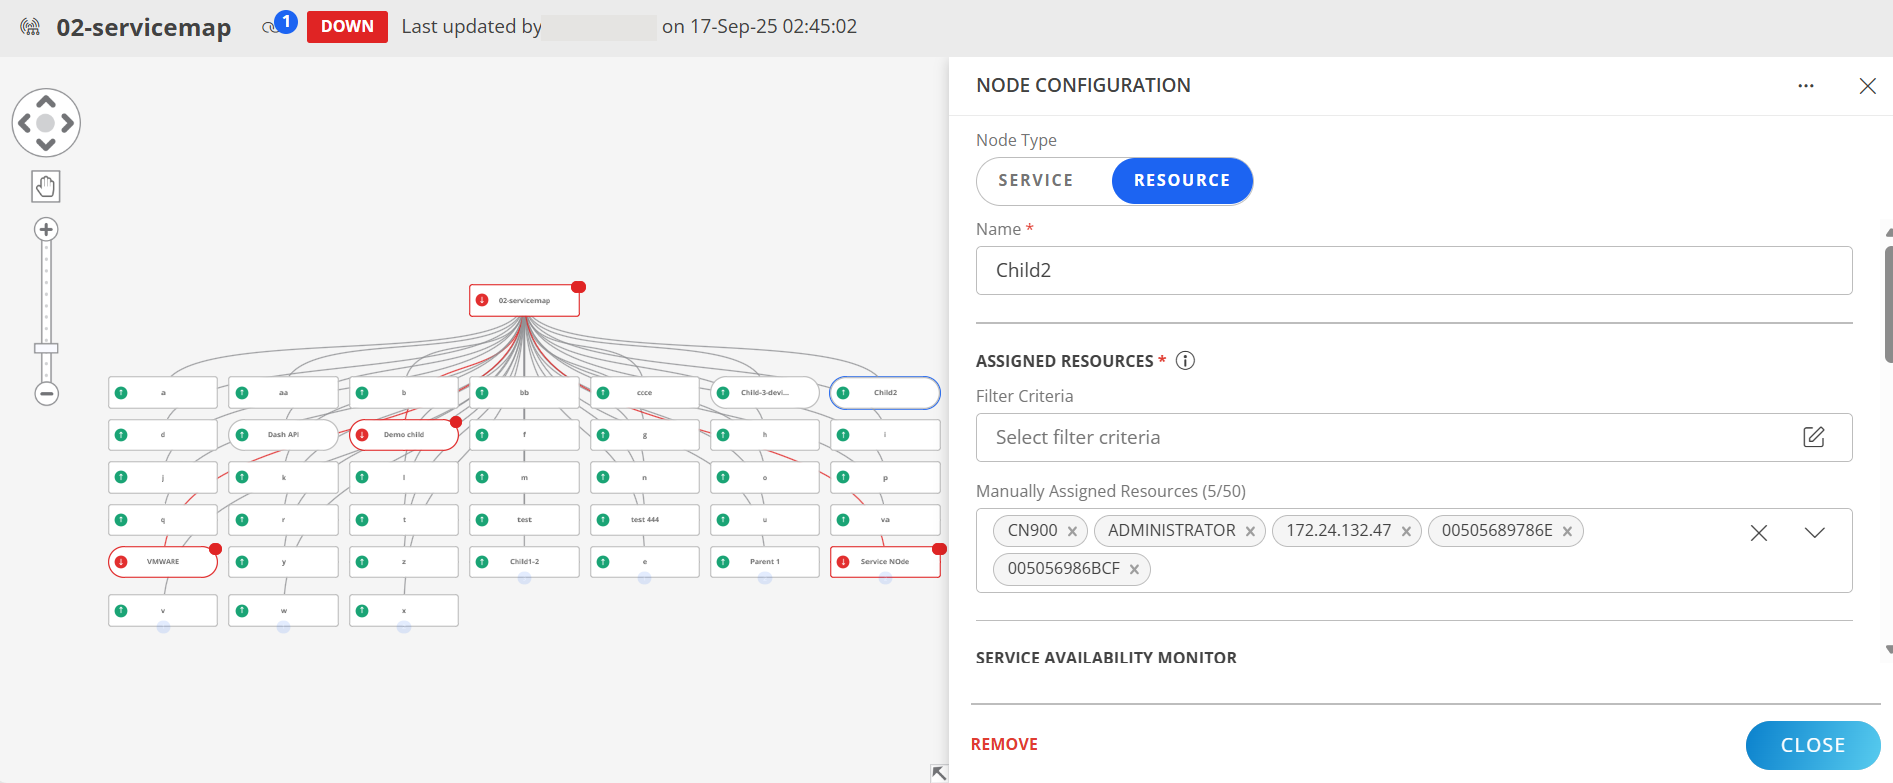
When you click on a resource in the Topology Map, a set of actions becomes available to help you manage and configure that resource. These options allow you to assign resource to service map, assign custom attributes, assign monitoring templates, assign credentials, add maintenance windows, and include notes, ensuring better control and customization of resource behavior.
Resource actions
Following are the actions you can perform on a resource in Topology Map:
- Assign to service map
- Assign credentials
- Assign custom attribute
- Assign monitoring template
- Add maintenance window
- Add note
- Remove
Assign to service map
When working with Topology Maps, you have an option to assign one or more resources to service maps.
From the topology map screen you can:
- Add resources to an existing service map
- Create a service map and assign resource nodes.
New Service Map
Follow these steps to assign resources to a new service map:
Click Infrastructure > Topology Maps.
Select an entity from the dropdown. Select a resource from another dropdown.
From the topology map, click on a resource.
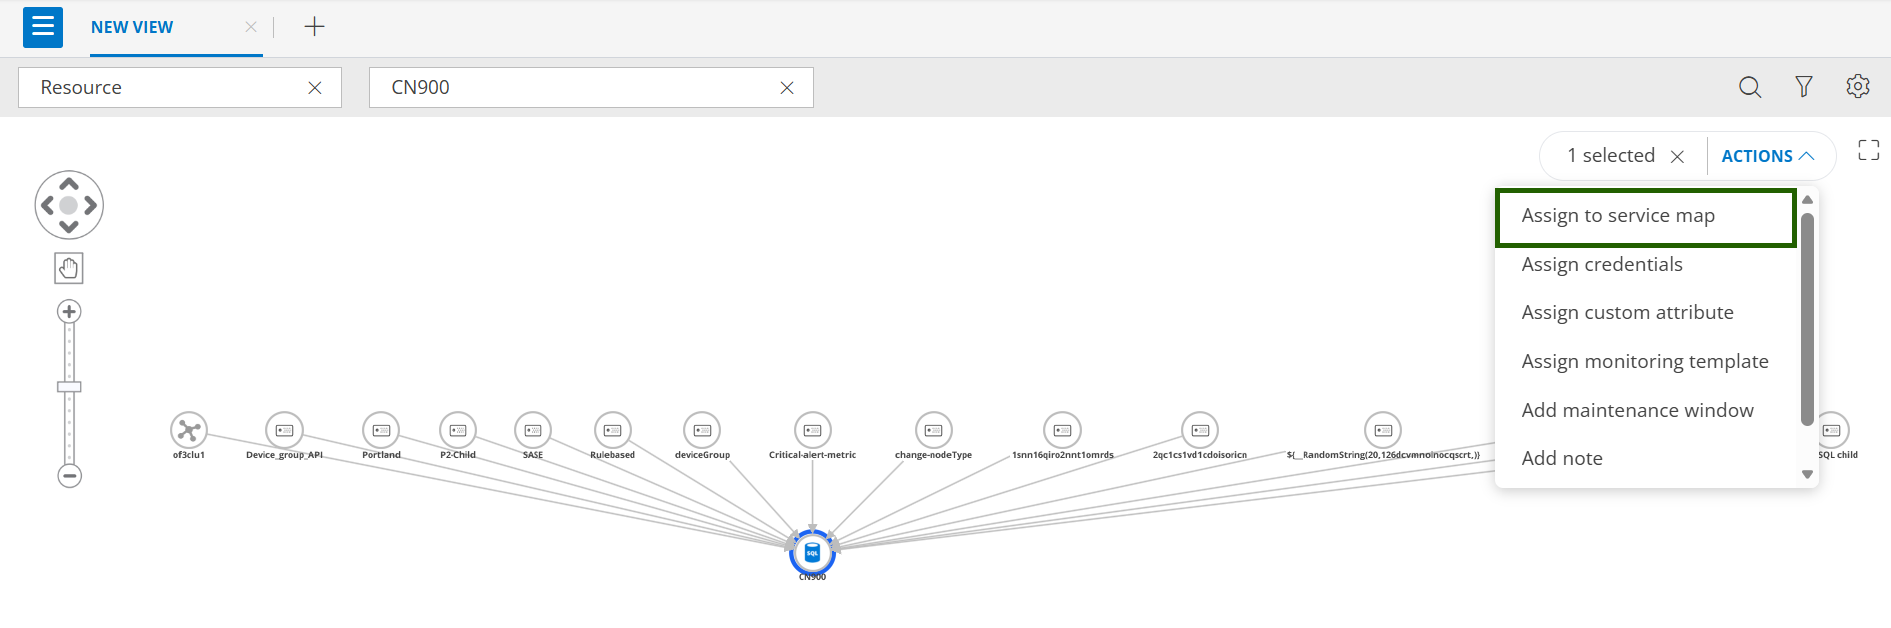
From ACTIONS dropdown, select Assign to service map. The ASSIGN TO SERVICE MAP slide-out is displayed.
The selected resources will be assigned to a resource node created under the new service map.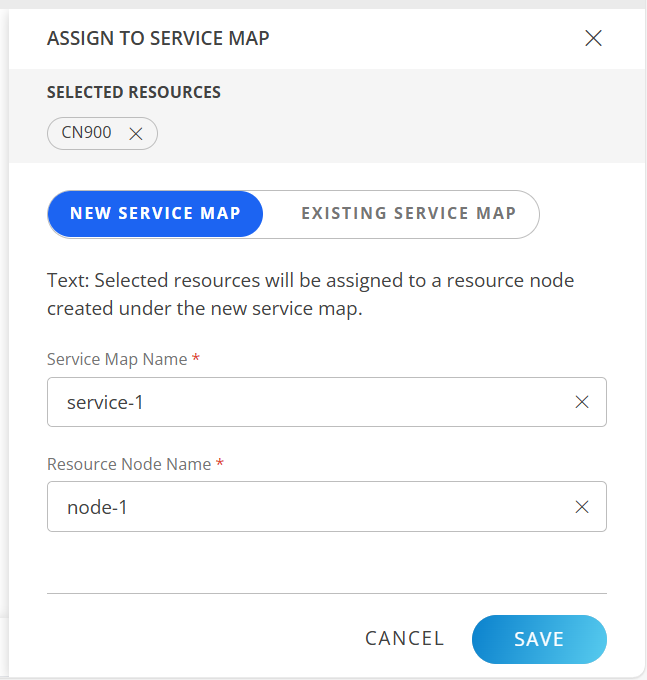
Enter the following information:
Field Name Field Type Description Service Map Name String Provide a unique service map name. Resource Node Name String Provide a resource node name. Click SAVE. The service map is added. A confirmation message appears. Click View service map in the message to view the newly added service map.
Existing Service Map
Follow these steps to assign resources to an existing service map:
Click Infrastructure > Topology Maps.
Select an entity from the dropdown. Select a resource from another dropdown.
From the topology map, click on a resource.
From ACTIONS dropdown, select Assign to service map. The ASSIGN TO SERVICE MAP slide-out is displayed.
Click EXISTING SERVICE MAP. Select an existing service map and specify a parent node to add a new resource node with the selected resources. You can also select an existing resource node.
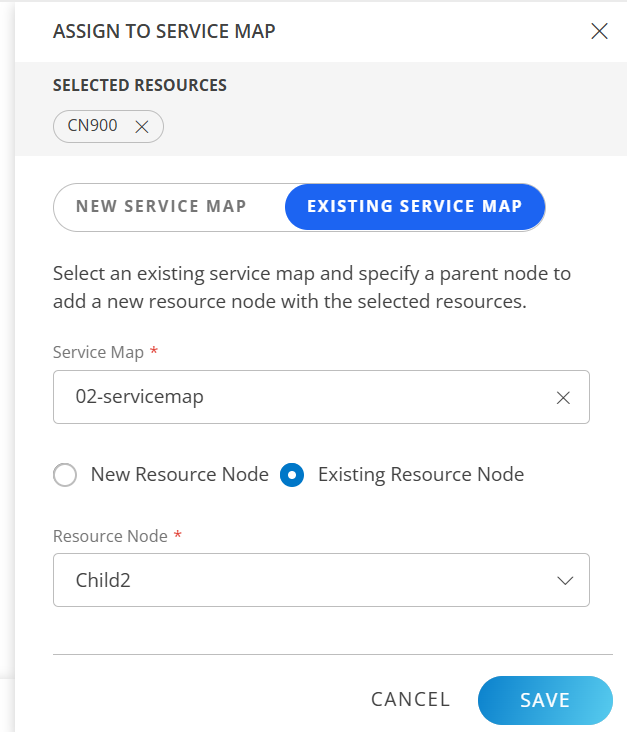
Select a service map from the dropdown.
You can specify a new resource node name under an existing parent service node, or select an existing resource node.- New Resource Node:
- Select Parent Service Node from the dropdown.
- Enter a resource node name.
- Existing Resource Node:
- Select a resource node from the dropdown.
- Select a resource node from the dropdown.
- New Resource Node:
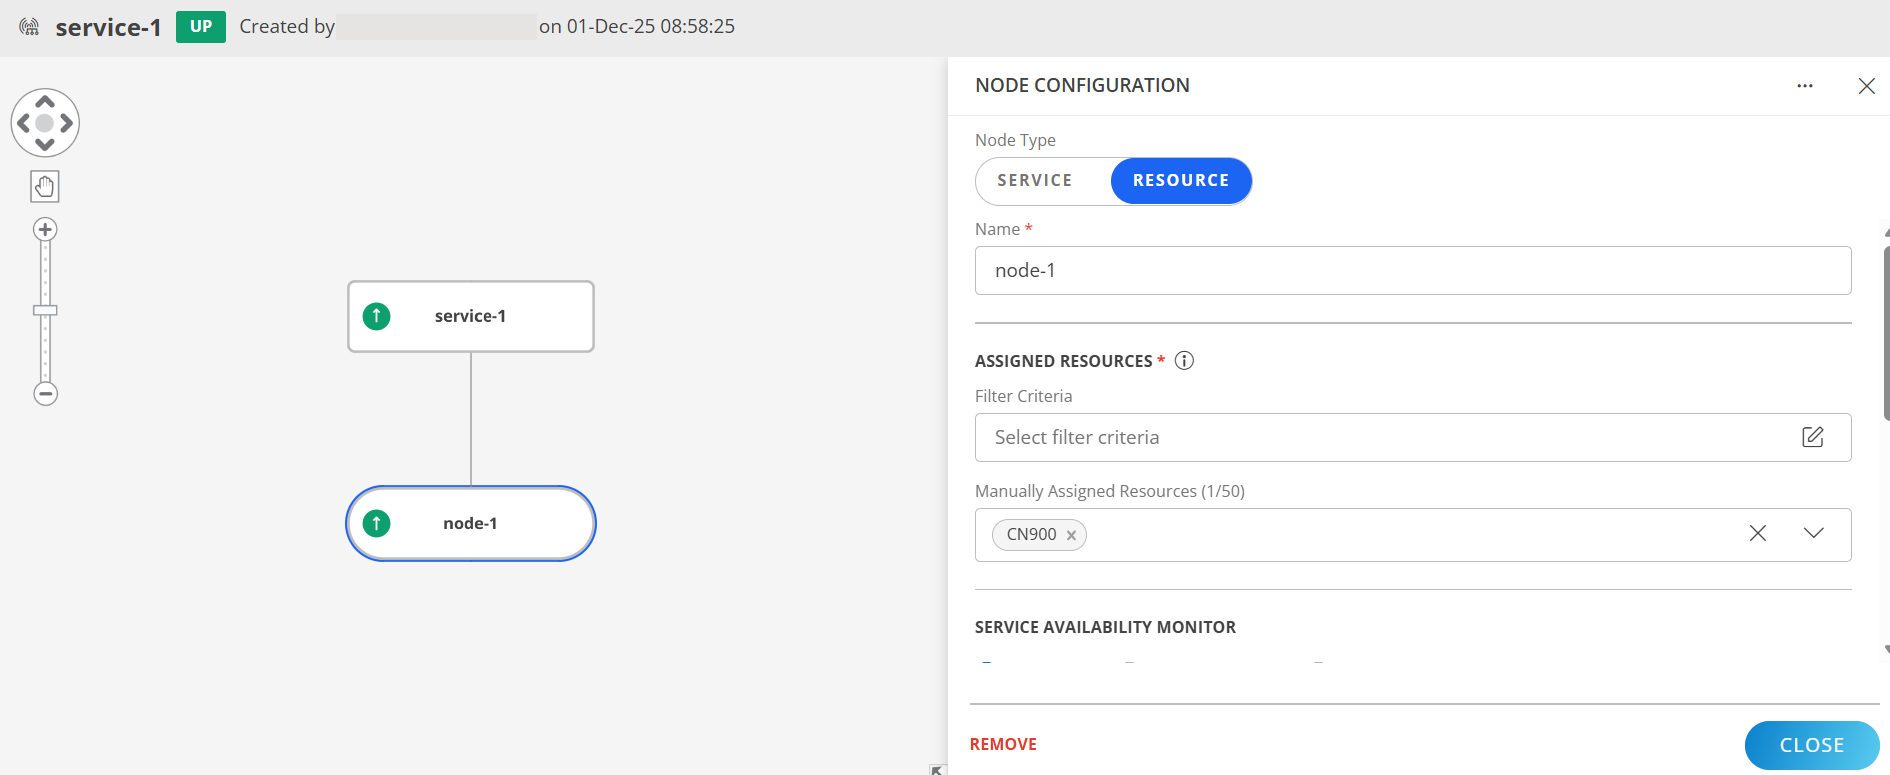
Click SAVE. A confirmation message appears. Click View service map in the message. The service map page appears, which shows the resource that is added to the existing service map.
See Service Maps for more information.
Assign credentials
Follow these steps to assign credentials to resource:
- Click Infrastructure > Topology Maps.
- Select an entity from the dropdown. Select a resource from another dropdown.
- From the topology map, click on a resource.
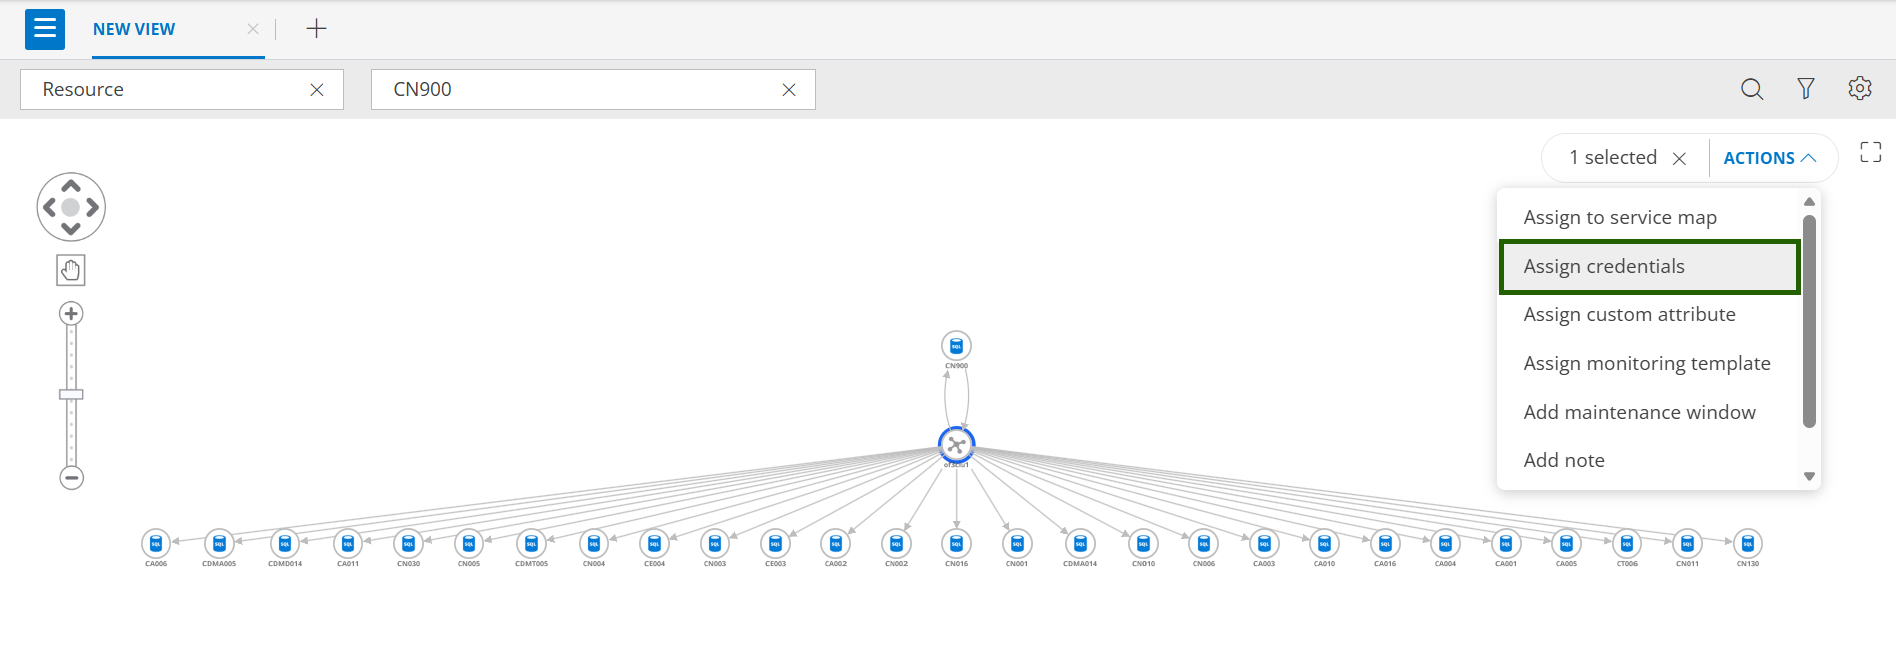
- From ACTIONS dropdown, select Assign credentials. The ASSIGN TO SERVICE MAP slide-out is displayed.
- From ASSIGN CREDENTIAL slide-out, select one or more credentials from the dropdown.
- Click Manage credentials from the dropdown, if you want to add or manage credentials. See Credentials for more information.
- Click ASSIGN CREDENTIAL. The credentials are assigned and a confirmation message appears.
Assign custom attribute
Follow these steps to assign custom attribute to resource:
- Click Infrastructure > Topology Maps.
- Select an entity from the dropdown. Select a resource from another dropdown.
- From the topology map, click on a resource.
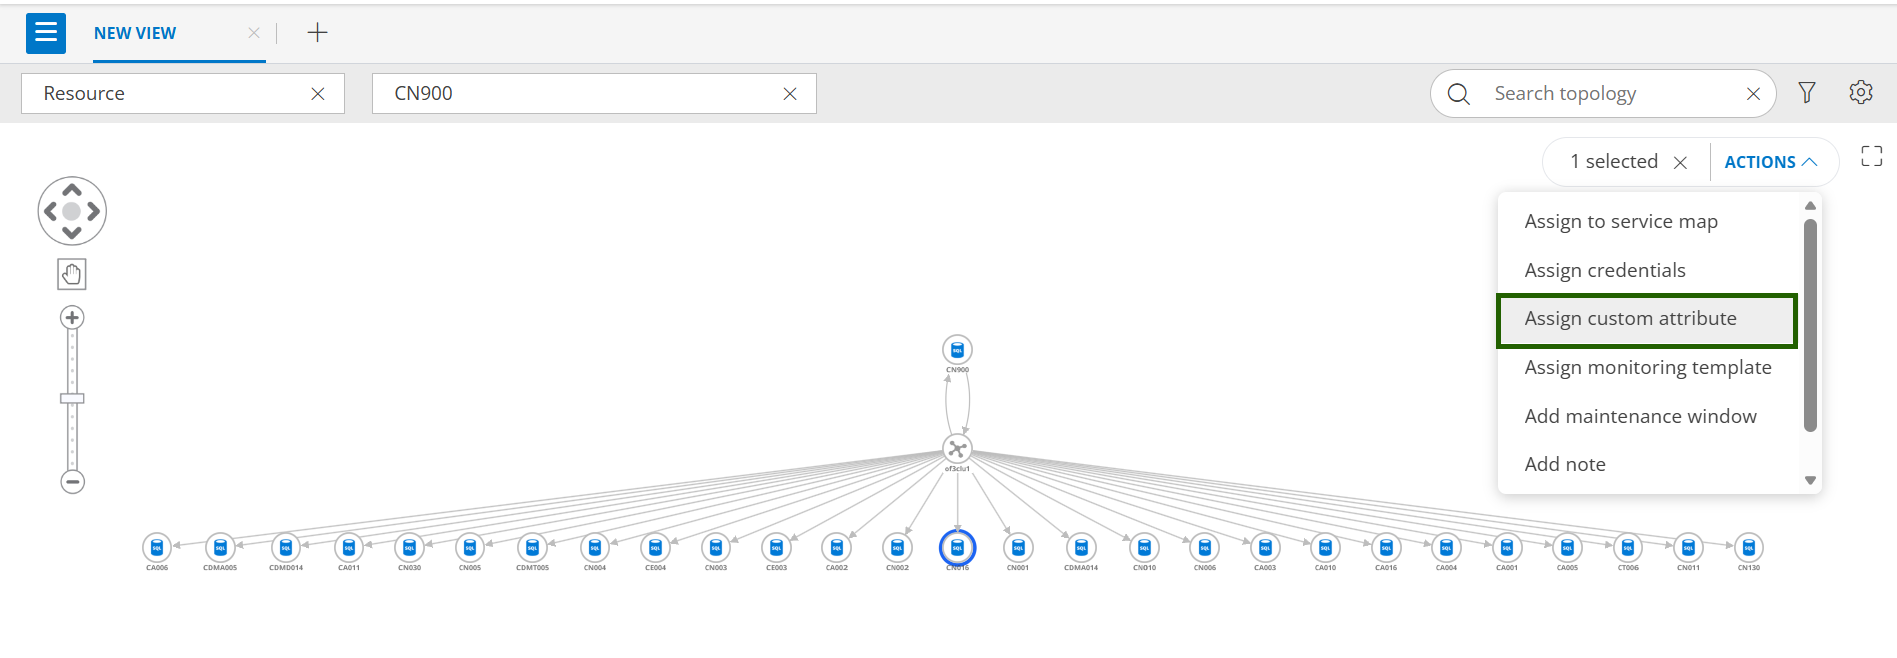
- From ACTIONS dropdown, select Assign custom attribute. The ASSIGN CUSTOM ATTRIBUTE slide-out is displayed.
- Select custom attribute name and value and click ASSIGN CUSTOM ATTRIBUTE. A confirmation message appears.
See Custom Attributes for more information.
Assign monitoring template
Follow these steps to assign monitoring template to resource(s):
- Click Infrastructure > Topology Maps.
- Select an entity from the dropdown. Select a resource from another dropdown.
- From the topology map, click on a resource.
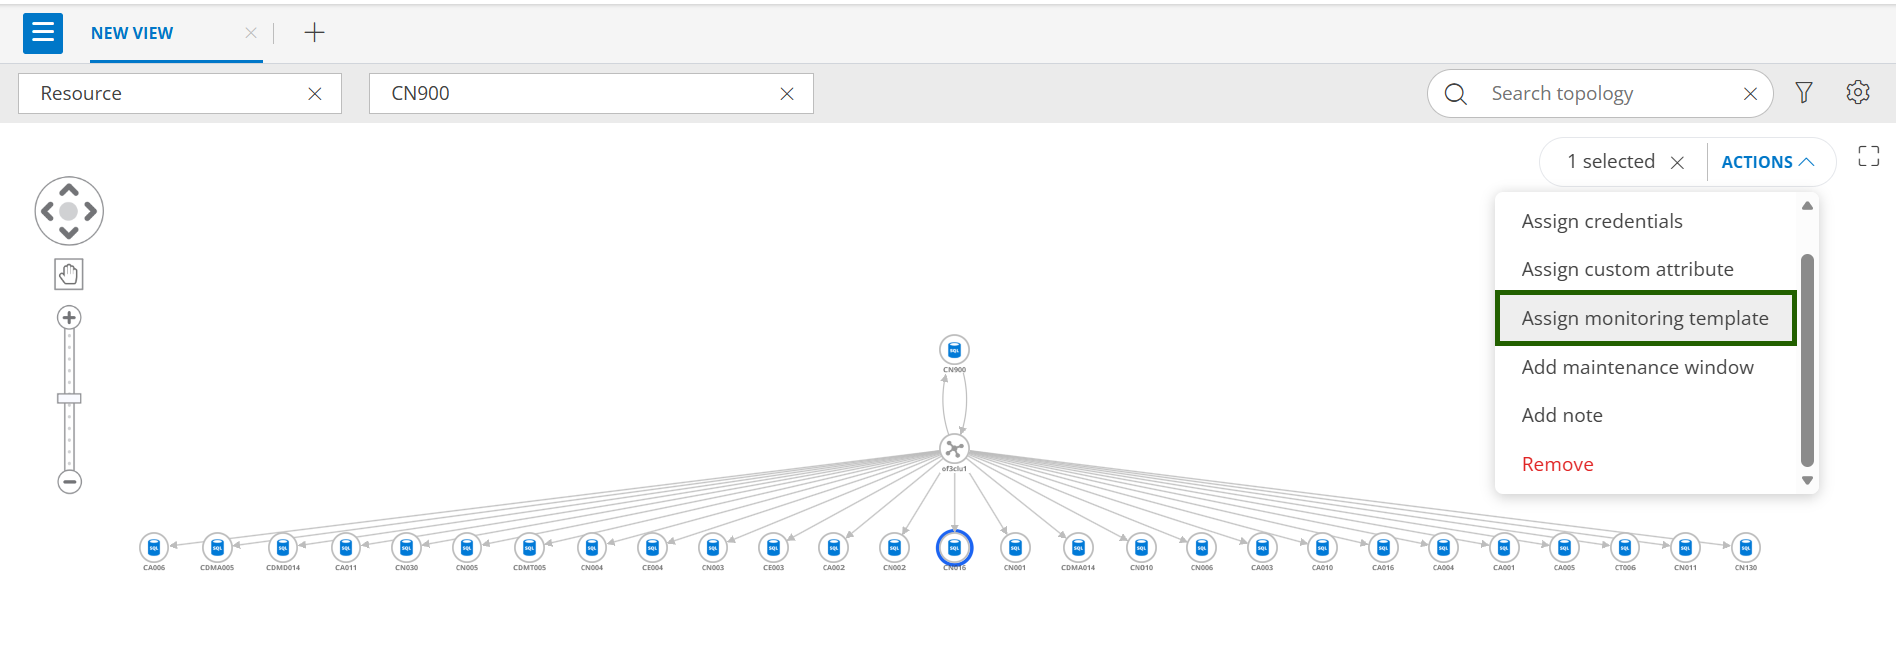
- From ACTIONS dropdown, select Assign monitoring template. The ASSIGN TEMPLATES page is displayed.
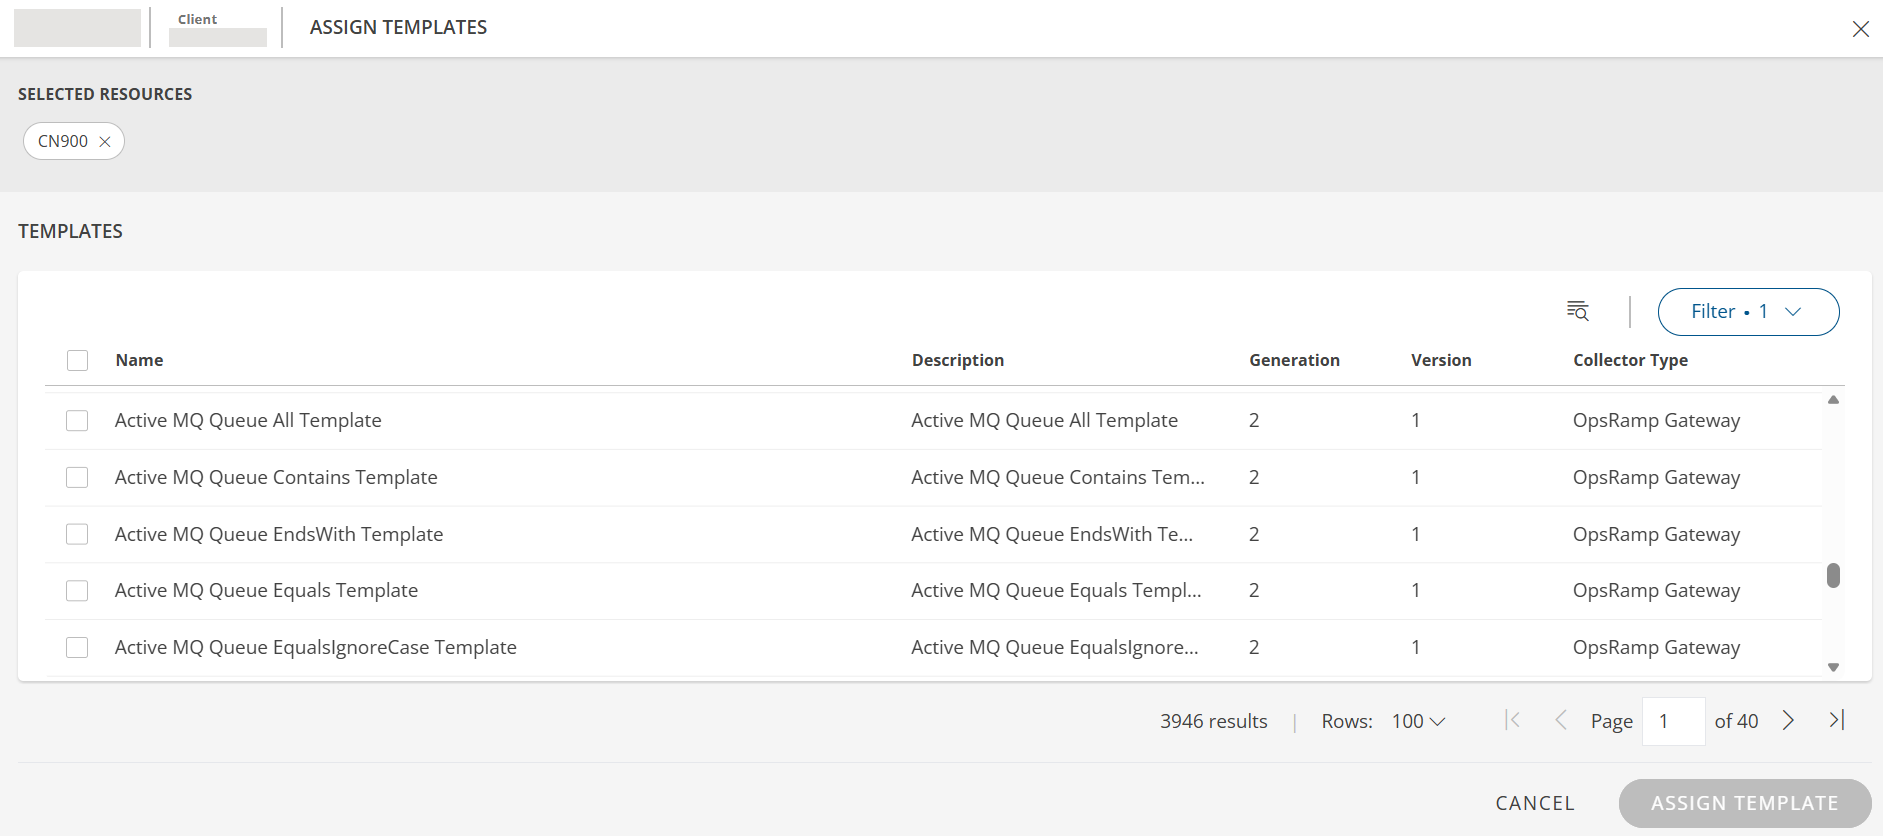
- Use the Filter option to filter the template(s).
- Select the templates and click ASSIGN TEMPLATE. The template(s) is assigned and a confirmation message appears.
Add maintenance window
Follow these steps to add maintenance window to resource(s):
- Click Infrastructure > Topology Maps.
- Select an entity from the dropdown. Select a resource from another dropdown.
- From the topology map, click on a resource.
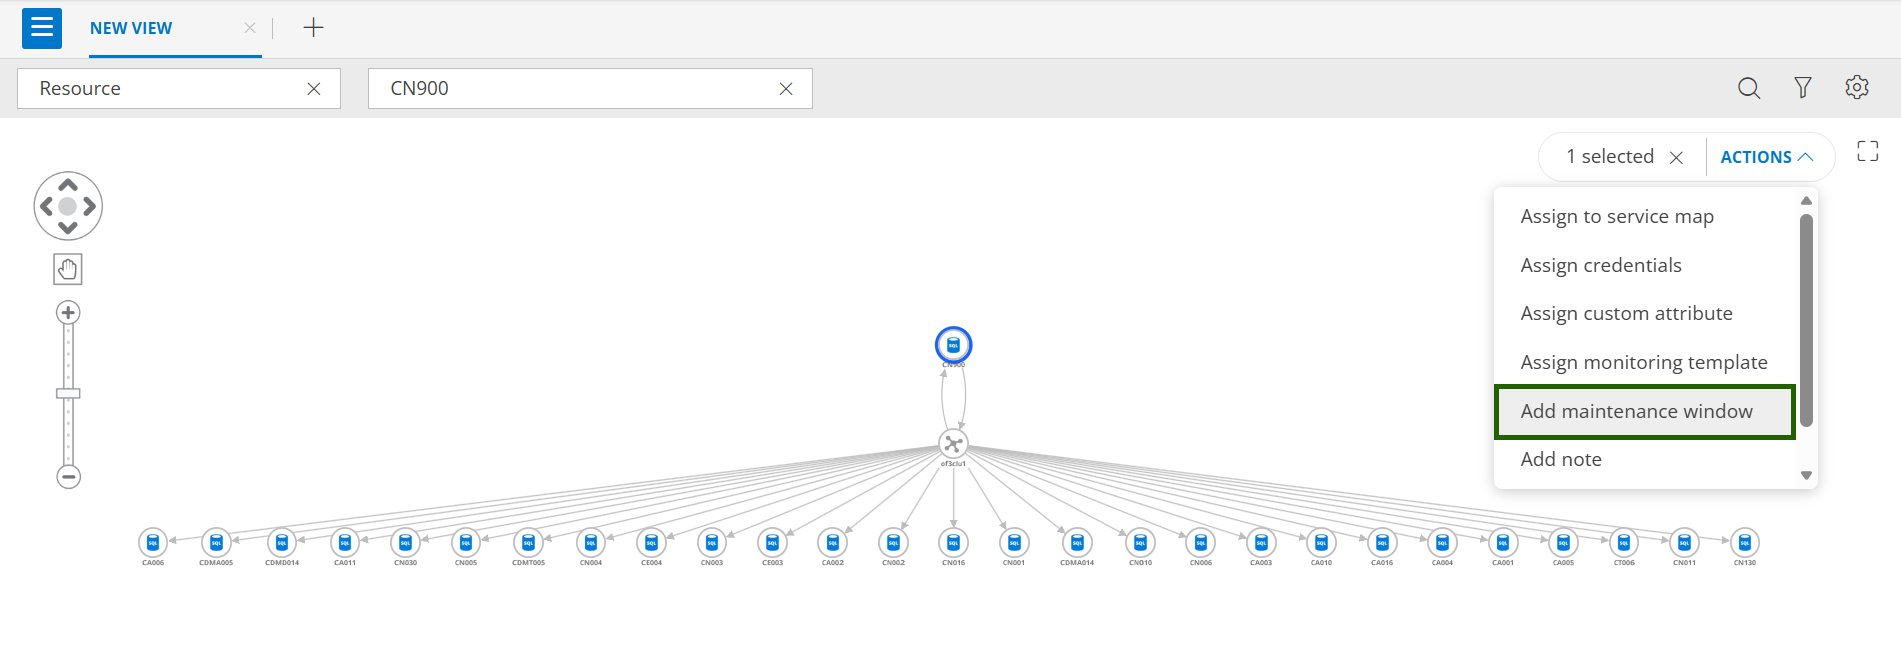
- From ACTIONS dropdown, select Add maintenance window. The ADD MAINTENANCE WINDOW slide-out is displayed.
- See Scheduled Maintenance documentation to enter the maintenance window details.
- Click ADD MAINTENANCE WINDOW. The maintenance window is added to the selected resource(s).
Add note
Follow these steps to add a note to resource(s):
- Click Infrastructure > Topology Maps.
- Select an entity from the dropdown. Select a resource from another dropdown.
- From the topology map, click on a resource.
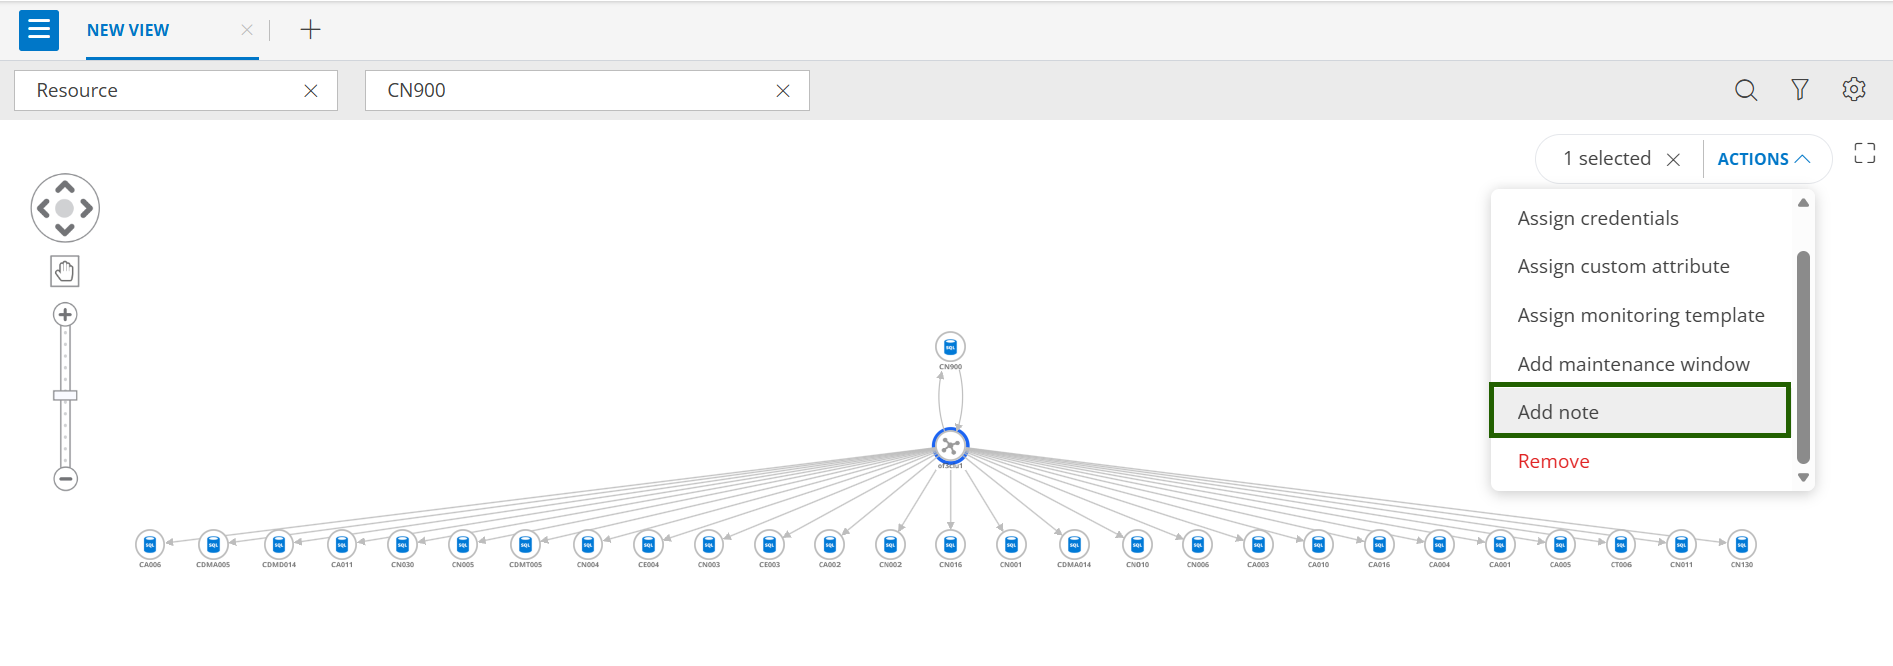
- From ACTIONS dropdown, select Add note. The ADD NOTE slide-out is displayed.
- Enter Subject, Description and select Time range.
- Click SAVE. The note is added.
Remove
Follow these steps to delete resource(s):
- Click Infrastructure > Topology Maps.
- Select an entity from the dropdown. Select a resource from another dropdown.
- From the topology map, click on a resource.
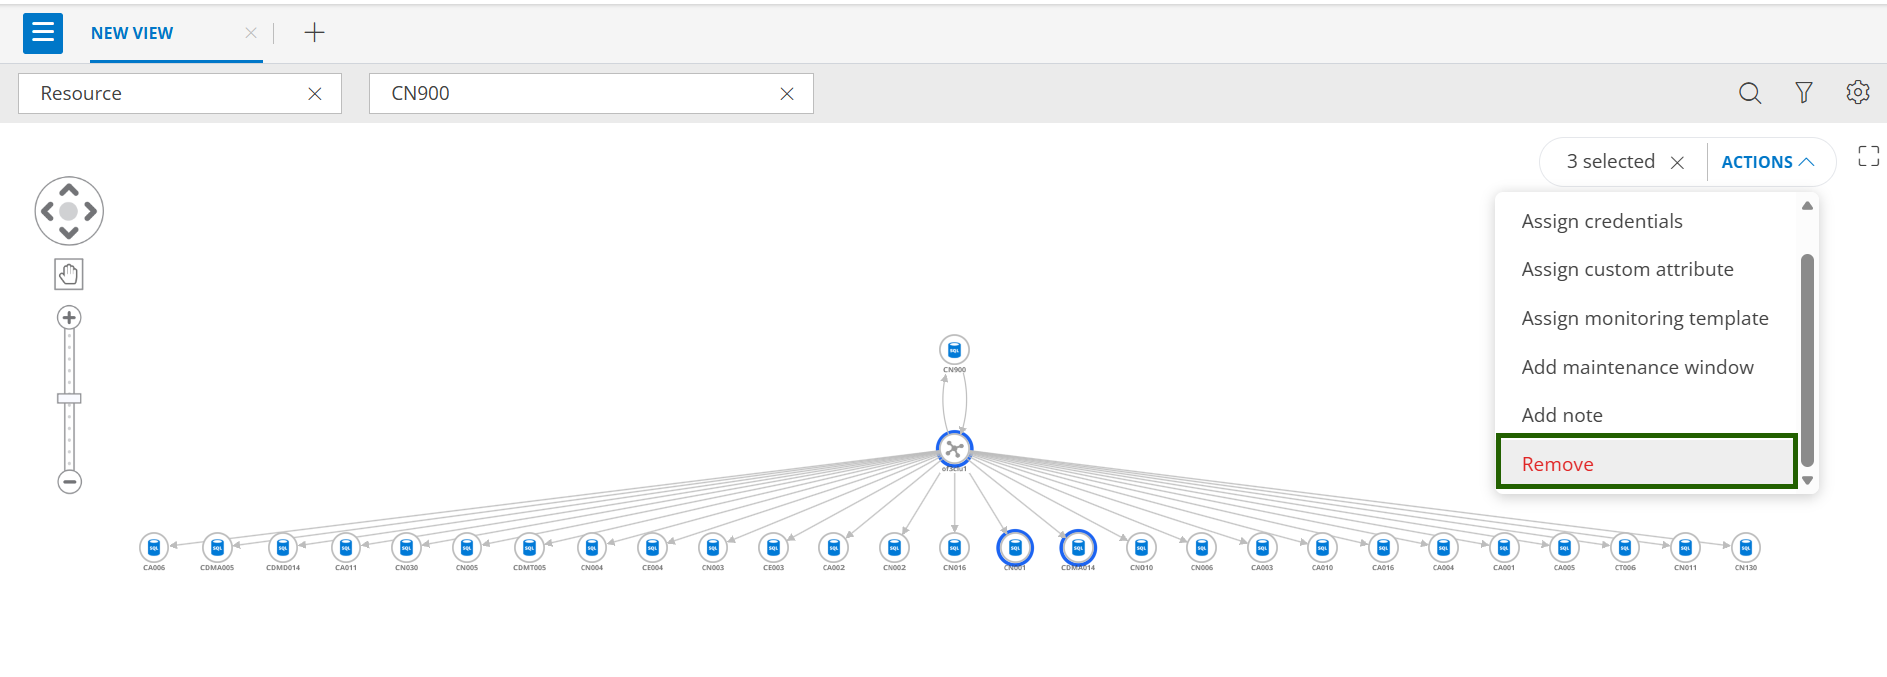
- From ACTIONS dropdown, select Remove. A confirmation popup appears.
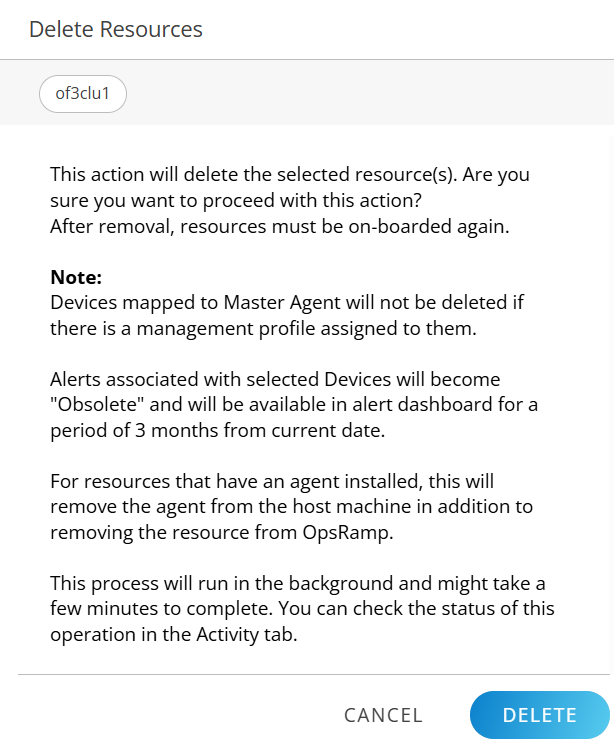
- Click DELETE. A confirmation message appears.